

Table of Contents
Introduction/No Nut Protein Bars Recipe
Are you tired of finding healthy snacks that are both tasty and free from common allergens? If you’re on the lookout for a no nut protein bars recipe that will not only satisfy your hunger but also provide you with the nutrients you need throughout the day, you’ve come to the right place!
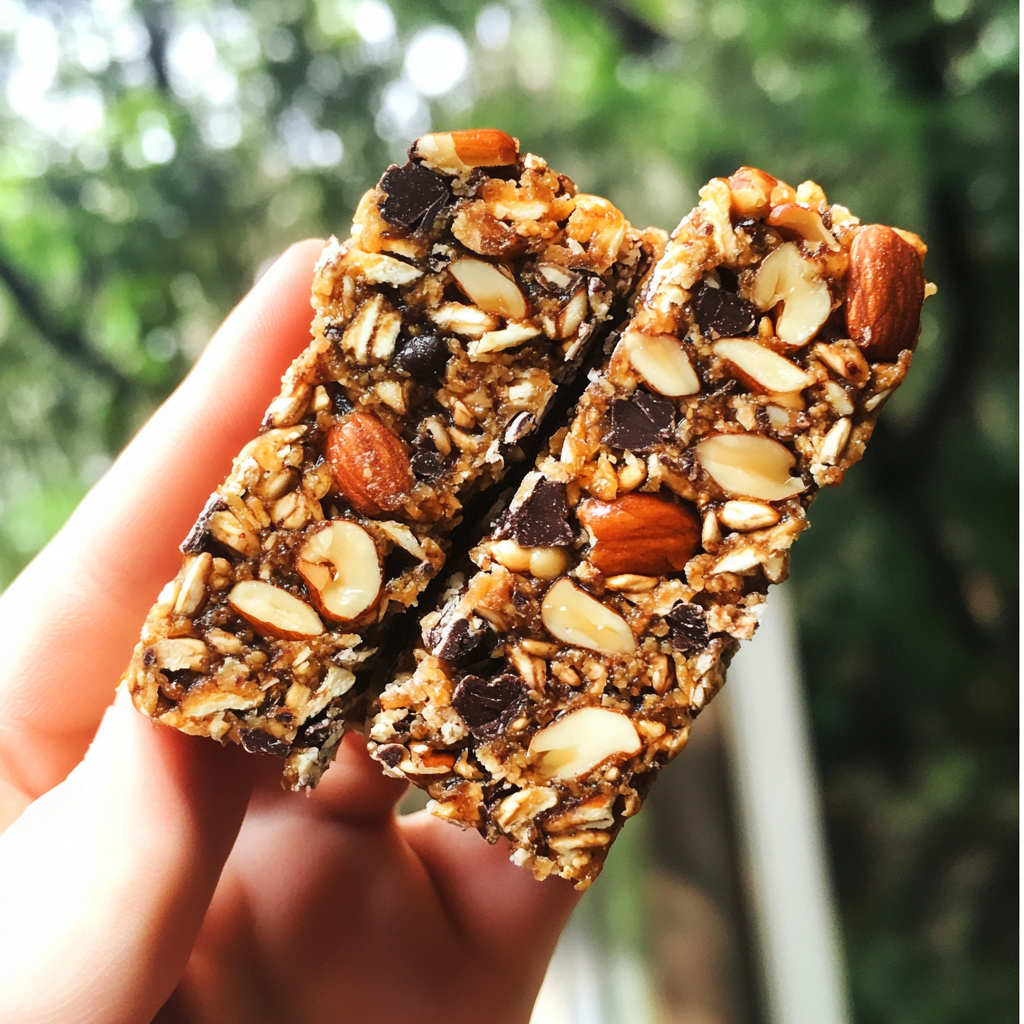
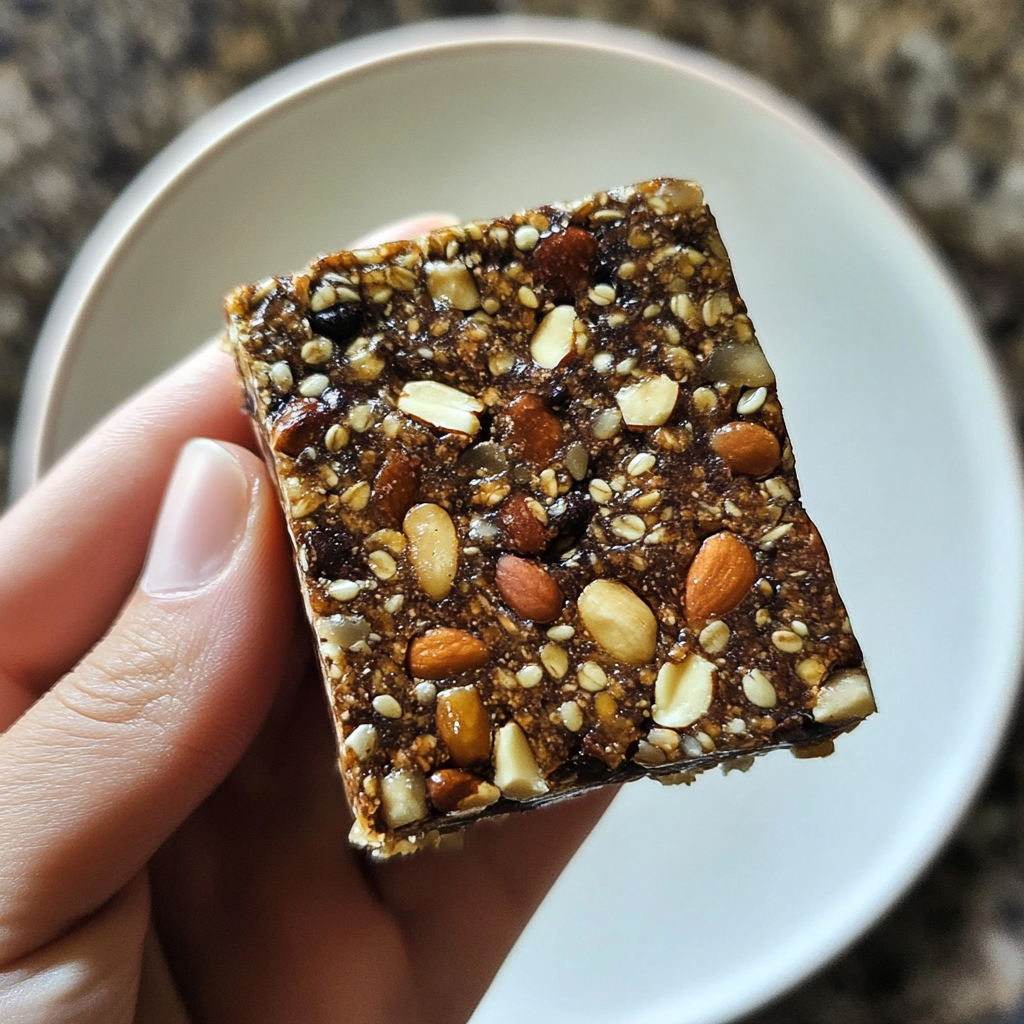
These no nut protein bars are designed specifically for people with nut allergies but are also great for anyone looking to try something different in their diet. They are packed with healthy ingredients such as seeds, oats, and natural sweeteners. Whether you need a snack to fuel your workout or something to munch on during the workday, these bars will keep you energized and feeling full.
In this article, we’ll show you how easy it is to make these bars at home. By following this simple no nut protein bars recipe, you can ensure that you’re getting the right nutrients without the risk of allergens like peanuts or almonds.
What Are No Nut Protein Bars Recipe?
No Nut Protein Bars are protein-packed snacks that exclude any form of nuts. These bars are typically made with alternative sources of protein, such as seeds (sunflower, chia, pumpkin), legumes, or protein powders. They’re the perfect option for individuals who suffer from nut allergies, as well as those who want to avoid nuts for other reasons such as dietary preferences or intolerances.
Protein bars are a great way to fuel up between meals or after a workout. However, finding a good no nut protein bar that’s also delicious and healthy can be tricky. That’s where making your own comes in! By making these protein bars at home, you can control the ingredients, ensuring that they’re not only safe but also packed with nutrients.
Benefits of No Nut Protein Bars Recipe
Making your own no nut protein bars comes with a plethora of benefits. These snacks offer much more than just convenience—they’re also great for your body and overall health. Let’s break down the main benefits:
- Allergy-Friendly: The biggest benefit of no nut protein bars is that they’re safe for anyone with nut allergies. Many people suffer from severe reactions to nuts, which can lead to life-threatening situations. These bars eliminate that risk, while still providing the nutritional benefits of protein-rich foods.
- High in Protein: Protein is essential for maintaining muscle mass, repairing tissue, and supporting a healthy immune system. These no nut protein bars are rich in protein, making them an excellent choice for athletes or anyone looking to maintain a balanced diet.
- Rich in Fiber: Many of the ingredients in no nut protein bars are high in fiber, which helps to regulate digestion. Fiber is important for maintaining gut health and can help you feel fuller for longer, reducing unnecessary snacking.
- Low Sugar: Pre-packaged protein bars often have hidden sugars that can sabotage your health goals. When you make your own, you have full control over how much sugar is added, ensuring that your bars are as low in sugar as possible. Using natural sweeteners like honey, maple syrup, or dates gives these bars a much healthier profile.
- Portable and Convenient: These bars are perfect for people on the go. Whether you’re heading to work, the gym, or running errands, no nut protein bars make it easy to have a healthy snack wherever you are. They’re easy to carry around and don’t require refrigeration for short periods.
No Nut Protein Bars Recipe
Ingredients
Making no nut protein bars is easy, and you’ll be surprised by how delicious and nutritious they are. Here’s what you’ll need:
- 1 cup rolled oats: Oats are a great source of fiber and complex carbohydrates, helping to keep you energized and full for longer periods.
- 1/2 cup protein powder: You can choose from a variety of plant-based protein powders such as pea protein, hemp protein, or a vegan protein blend.
- 1/4 cup chia seeds: Chia seeds are packed with fiber, protein, and omega-3 fatty acids, making them an excellent addition to your protein bars.
- 1/4 cup sunflower seeds: Sunflower seeds are a great nut-free source of protein and healthy fats.
- 1/3 cup dried cranberries or raisins: Dried fruit adds a touch of sweetness and natural sugars to the bars.
- 1/5 cup honey or maple syrup: Natural sweeteners like honey or maple syrup help bind the ingredients together and add a bit of sweetness.
- 2 tbsp coconut oil: Coconut oil provides healthy fats and helps keep the bars from becoming too dry.
- 1/2 cup almond milk or oat milk: Milk substitutes like almond or oat milk provide moisture and richness to the mixture.
- 1 tsp vanilla extract: Vanilla enhances the overall flavor, making the bars more enjoyable.
- 1/2 tsp ground cinnamon: Cinnamon adds a warming spice to the bars and pairs wonderfully with the other ingredients.
Step-by-Step Cooking Instructions
Follow these simple steps to make your own no nut protein bars:
- Prepare the Dry Ingredients:
In a large bowl, combine the rolled oats, protein powder, chia seeds, sunflower seeds, and dried cranberries (if using). Mix everything well so the dry ingredients are evenly distributed. - Mix the Wet Ingredients:
In a small bowl, whisk together the honey (or maple syrup), coconut oil, almond milk, vanilla extract, and ground cinnamon until smooth. - Combine the Wet and Dry Ingredients:
Pour the wet ingredients into the dry mixture and stir until the ingredients are fully combined. The mixture should be sticky but not too wet. If it feels too dry, you can add a little more milk or coconut oil to adjust the consistency. - Press the Mixture into a Pan:
Line an 8×8-inch baking pan with parchment paper. Transfer the mixture into the pan and press it down firmly using a spoon or spatula. Make sure it’s spread evenly and packed tightly. - Chill and Set:
Place the pan in the fridge and let the mixture chill for at least 2 hours or until the bars are firm and set. - Slice and Serve:
After the bars have set, remove them from the fridge and slice them into squares or rectangles. Store them in an airtight container in the fridge for up to a week, or freeze them for longer storage.
Pro Tips for Perfecting Your No Nut Protein Bars Recipe
- Customize the Protein: You can choose different types of protein powder, such as brown rice protein, soy protein, or even collagen powder if you want to adjust the flavor or texture.
- Sweetness Adjustment: If you prefer sweeter bars, you can increase the amount of honey or maple syrup. Alternatively, try adding stevia or monk fruit for a lower-calorie option.
- Add Texture: To make your bars more interesting, you can experiment with adding texture by using ingredients like shredded coconut, cacao nibs, or puffed quinoa.
- Use a Baking Pan Liner: Parchment paper or a silicone mat will help you remove the bars from the pan easily without sticking or making a mess.
Alternatives and Variations
While the basic recipe is delicious on its own, there are several ways you can customize your no nut protein bars to fit your preferences.
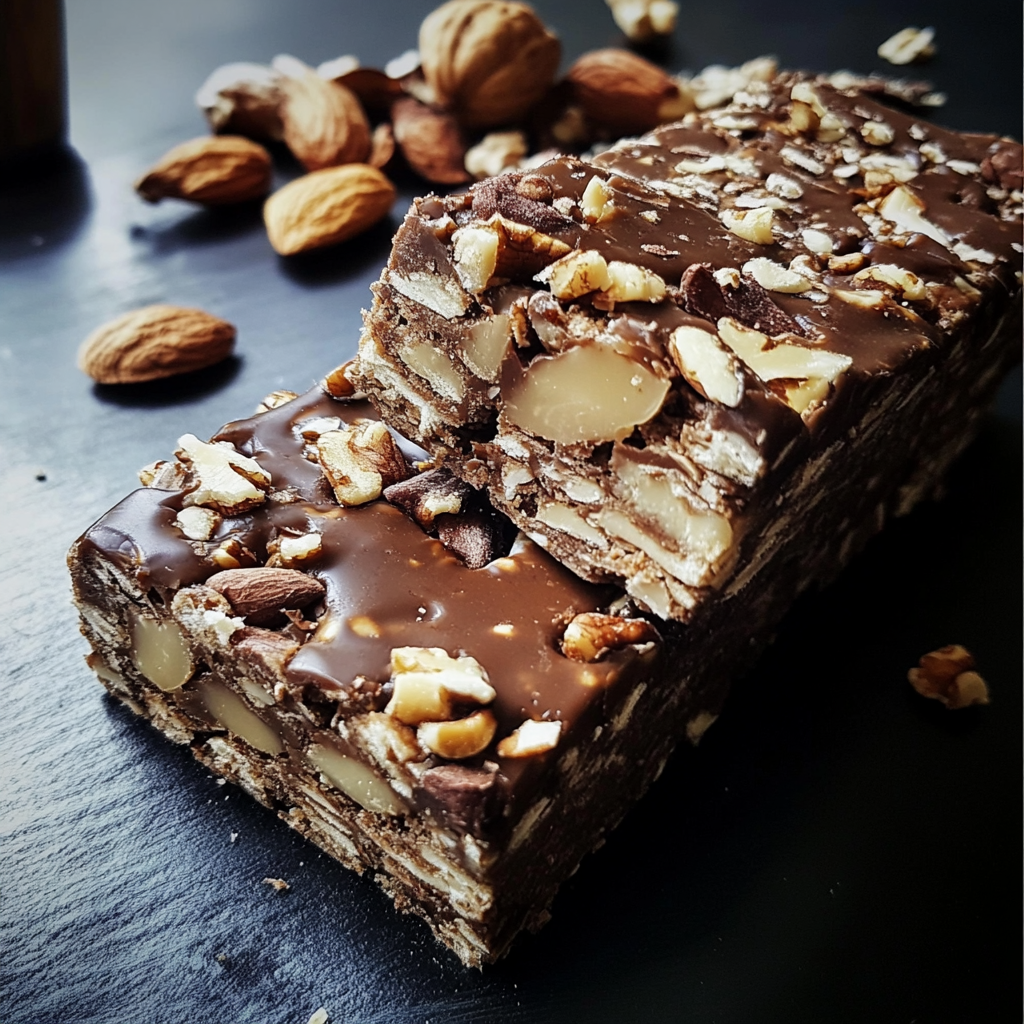
- Chocolate Protein Bars: Add 2-3 tablespoons of cocoa powder to the mixture for a chocolatey twist. You can also stir in some chocolate chips or cacao nibs for extra texture.
- Berry Protein Bars: Swap out the dried cranberries for dried blueberries, strawberries, or raspberries for a fruity flavor.
- Superfood Protein Bars: Add superfoods like spirulina, matcha powder, or maca powder to increase the nutritional value of your bars.
The Nutritional Value of No Nut Protein Bars
Each serving of these no nut protein bars offers a balance of protein, fiber, and healthy fats, making them a great choice for a nutritious snack. On average, each bar contains:
- Calories: 180-250 calories per bar (depending on the size and ingredients used)
- Protein: 8-12 grams of protein per serving
- Fiber: 5-7 grams of fiber per serving
- Healthy Fats: 10-15 grams of healthy fats, mostly from seeds and coconut oil
These bars are great for maintaining energy levels throughout the day and can help curb hunger, making them a perfect snack for those with active lifestyles or busy schedules.
How to Make Your No Nut Protein Bars Even Healthier
If you’re looking to make your no nut protein bars even healthier, consider incorporating the following ideas:
- Add More Seeds: Include a variety of seeds such as flaxseeds, hemp seeds, or pumpkin seeds. These seeds are rich in omega-3 fatty acids and fiber, which contribute to heart health and digestive well-being.
- Use Whole Grains: Instead of rolled oats, you can use whole grain oats or quinoa flakes for an even more nutritious base.
- Opt for Low-Glycemic Sweeteners: Choose sweeteners like stevia, monk fruit, or coconut sugar instead of traditional honey or maple syrup to reduce the glycemic load and keep your blood sugar levels stable.
Frequently Asked Questions (FAQs)/No Nut Protein Bars Recipe
Q1: Can I use a different type of protein powder?
A1: Yes, you can use any plant-based protein powder, such as hemp, soy, or rice protein powder. Just ensure that the protein powder you use blends well into the mixture.
Q2: How can I make the bars softer or chewier?
A2: To make the bars softer, you can reduce the amount of oats or protein powder and increase the amount of coconut oil or almond milk. This will add moisture to the bars, making them chewier.
Q3: Can I freeze these protein bars?
A3: Absolutely! You can freeze the bars for up to 3 months. Simply wrap them individually in wax paper or store them in an airtight container before freezing.
Conclusion
Making your own no nut protein bars is a fun and rewarding way to ensure you’re getting a nutritious and allergy-friendly snack. These bars are easy to make, customizable, and can be enjoyed by everyone, regardless of their dietary restrictions. By following this no nut protein bars recipe, you’ll have a healthy snack that’s not only delicious but also packed with protein, fiber, and healthy fats to keep you energized throughout the day.
So why wait? Grab your ingredients and try making these tasty, nutritious bars today! Your body will thank you.

No Nut Protein Bars Recipe: A Healthy Snack You’ll Love
Course: SnacksCuisine: AmericanDifficulty: Easy8-10
servings10
minutes~300
kcalDiscover a healthy and allergy-friendly no nut protein bars recipe. Perfect for a quick snack, these bars are packed with protein and nutrients!
Ingredients
1 cup rolled oats: Oats are a great source of fiber and complex carbohydrates, helping to keep you energized and full for longer periods.
1/2 cup protein powder: You can choose from a variety of plant-based protein powders such as pea protein, hemp protein, or a vegan protein blend.
1/4 cup chia seeds: Chia seeds are packed with fiber, protein, and omega-3 fatty acids, making them an excellent addition to your protein bars.
1/4 cup sunflower seeds: Sunflower seeds are a great nut-free source of protein and healthy fats.
1/3 cup dried cranberries or raisins: Dried fruit adds a touch of sweetness and natural sugars to the bars.
1/5 cup honey or maple syrup: Natural sweeteners like honey or maple syrup help bind the ingredients together and add a bit of sweetness.
2 tbsp coconut oil: Coconut oil provides healthy fats and helps keep the bars from becoming too dry.
1/2 cup almond milk or oat milk: Milk substitutes like almond or oat milk provide moisture and richness to the mixture.
1 tsp vanilla extract: Vanilla enhances the overall flavor, making the bars more enjoyable.
1/2 tsp ground cinnamon: Cinnamon adds a warming spice to the bars and pairs wonderfully with the other ingredients.
Directions
- Prepare the Dry Ingredients:
- In a large bowl, combine the rolled oats, protein powder, chia seeds, sunflower seeds, and dried cranberries (if using). Mix everything well so the dry ingredients are evenly distributed.
- Mix the Wet Ingredients:
- In a small bowl, whisk together the honey (or maple syrup), coconut oil, almond milk, vanilla extract, and ground cinnamon until smooth.
- Combine the Wet and Dry Ingredients:
- Pour the wet ingredients into the dry mixture and stir until the ingredients are fully combined. The mixture should be sticky but not too wet. If it feels too dry, you can add a little more milk or coconut oil to adjust the consistency.
- Press the Mixture into a Pan:
- Line an 8×8-inch baking pan with parchment paper. Transfer the mixture into the pan and press it down firmly using a spoon or spatula. Make sure it’s spread evenly and packed tightly.
- Chill and Set:
- Place the pan in the fridge and let the mixture chill for at least 2 hours or until the bars are firm and set.
- Slice and Serve:
- After the bars have set, remove them from the fridge and slice them into squares or rectangles. Store them in an airtight container in the fridge for up to a week, or freeze them for longer storage.
Notes
- Customization Options:
Feel free to customize the recipe to suit your taste or dietary needs. You can use different seeds (like flaxseeds or hemp seeds) or swap dried cranberries for raisins, dried blueberries, or other dried fruits of your choice.
Sweetener Adjustments:
If you prefer a sweeter bar, you can add a little more honey or maple syrup. Alternatively, use stevia or monk fruit for a low-calorie option. Keep in mind that adjusting the sweetener can affect the texture of the bars, so add sweeteners in small increments.
Texture Variations:
If you prefer chewier bars, increase the amount of coconut oil or almond milk to make the mixture more moist. For a crunchier texture, add more seeds or oats.
Storage:
These protein bars will last up to a week in an airtight container stored in the fridge. If you want to keep them for longer, you can freeze them for up to 3 months. Just make sure they’re tightly wrapped or stored in a freezer-safe container.
Protein Powder:
The type of protein powder you use can change the flavor and texture of the bars. Choose a plant-based protein powder like pea or hemp protein for a vegan option. If you use whey protein, the bars might have a slightly different texture, so you may need to adjust the amount of liquid.
Allergy-Friendly:
These bars are nut-free, making them suitable for individuals with nut allergies, but always check your ingredients to ensure they are free from cross-contamination if you’re preparing them in a shared kitchen.
Serving Size:
Depending on how large or small you cut your bars, the calorie content may vary. To maintain consistent portions, measure the mixture and evenly distribute it in the pan.
Chilling Time:
The bars need at least 2 hours in the fridge to set properly, so plan ahead if you’re preparing them for a specific event or snack time.


